
In the laboratory, several scientific instruments are required to process the experiments. Among such scientific devices, the Simple microscope has been considered one of such instruments that are generally used in order to identify or see small objects that usually occur to be unseen by a naked eye. Based on this concept, the current tutorial will define a Simple microscope along with explain several parts of it as well.

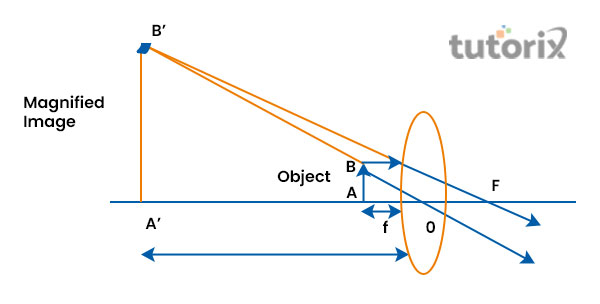
Figure 1: Simple microscope
A Simple microscope has been considered the first microscope that is constructed in the 17th century by Antony van Leeuwenhoek. The construction was simply made by combining a convex lens with a holder used for keeping specimens (Elisa et al. 2018). This microscope has the ability to magnify from 200 and 300 times. Apart from general uses in schools and learning purposes, this microscope is replaced by more powerful compound microscopes in the laboratories where scientific experiments are conducted.
The power of magnification of a simple microscope can be represented by a mathematical formula that is M = 1 + D/f. In this formula, the letter D represents the least distance of the distinct vision and the letter f is the representative of focal; length of convex lens. The focal length is considered small for the convex lens (Sciencing, 2022). The reason for this concept is that the more the focal length of the convex lens will be, the more the power of magnifying will be. The object is a simple microscope that generally appears 10 times larger than its actual size.
The work process of a simple microscope is based on a specific principle. The main principle of the work done by a simple microscope is that when a small object is placed under the convex lens with proper focus, an erect, virtual and magnified image is created (Touboul et al. 2019). This image is generally made at the least distance of distinct vision from the place where the eye of a person is placed on the lens.
In order to support the optical parts of a simple microscope, the adjustment of the focusing object needs to be done by the mechanical parts of the microscope. The mechanical parts of a simple microscope are as follows:
Stage: A metal plate beholds the shape of a rectangle and is fitted to the vertical rod. This metal plate has a hole in the central position for passing light from the below part of this plate (Vos, Blesa, & Betz, 2021). During the time of experimenting, the specimen needs to be placed right on top of the hole for having a clear magnified image.
Metal stand: This stand is made of heavy metal and a vertical rod is fitted to it. This vertical rod is attached in order to provide support to the other parts of the body of the microscope for maintenance of stability.

Figure 2: Biconvex lens used in microscope
Lens: Above the stage, a biconvex lens is fitted by means of a frame that helps to magnify the size of the specimen and in the formation of a virtual image that is enlarged when the ey is kept above it. In order to create proper focus, the lens can be moved up or down by the viewer.
Mirror: the mirror that is fitted below the stage to the vertical rod is generally recognised as the name of a Plano-convex mirror (Hsieh et al. 2018). This helps to focus the surrounding light right onto the specimen placed under the lens.

Figure 3: Application of simple microscope
In the present day, the usage of this specific type of microscope is observed for learning at schools and colleges. More specifically, for offering the learners a magnified sight of microscopic algae or fungi, a simple microscope is used. The watchmakers also used this specific type of microscope in order to examine the smallest parts of a watch. To find out and identify the finer parts of the pieces of jewellery, jewellers often used this microscope. One can get a magnified view of the texture of fibre or the tiniest particle of the soil as well.
The tutorial has focused on stating a Simple microscope generally has a set of magnifying glasses that are powerful and have a double convex lens with a short focal length. It has the ability to represent objects that are of a size range between 0.4-0.7 µm. In the tutorial, it has been explained that the image made by the microscope follows the process of virtual image-making that cannot be projected on a surface similar to a real image. Based on these basic attributes the tutorial has derived differences between a compound and a simple microscope.
Q1. How many types of microscopes are in use today?
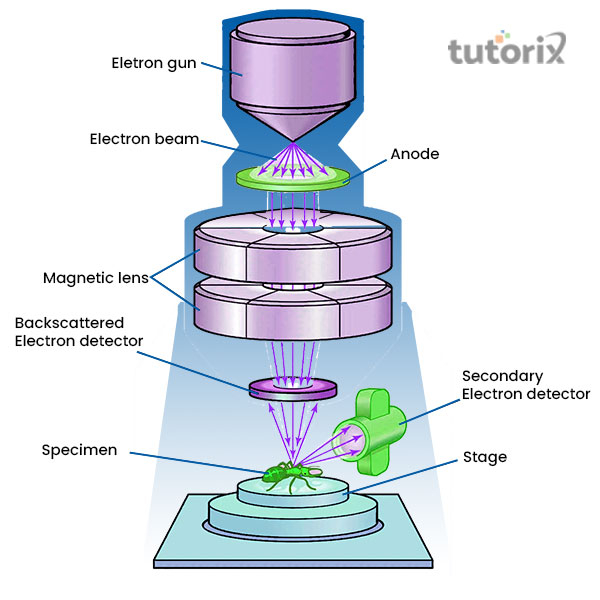
Ans: The most widely used microscope is the simple microscope, however, apart from such one type, there are other types of a microscope is available such as an electron, compound, fluorescence, ultraviolet and many more.
Q2. What is the function of a simple microscope?
Ans: The general use of a simple microscope is to magnify an image or an object with the help of a set of small converging lenses which are of high power.
Q3. What are the advantages of a simple microscope?
Ans: The simple microscope is able to create a virtual image of the object that is high in the resolution that helps to identify the surface details of an object.
Q4. What are the limitations of a simple microscope?
Ans: The resolution of the virtual picture presented by a simple microscope is lower in comparison to the other types of microscopes that are recently in use. Making the view of living materials is a bit challenging in simple microscopes.